Big Data Quality: Practical Approach – Part 1
[1.4.2014] D. PejčochIntroduction
The purpose of this article is to describe practical examples of Data Quality Management approaches within the world of Big Data. First part of this article provides practical tutorial how to install and configure Hadoop environment. In second part I will focus on practical examples of using Hive and Pig for retrospective Data Quality Management. In last part I will focus on deduplication based on Hadoop and Hadoop based extraction of knowledge potentially used as a source for data enhancement and data verification.
How to install and configure Hadoop
For our testing purpose I will demonstrate Hadoop installation and configuration on 3-nodes cluster based on Debian Squeezy (6) operating system. Let’s assume you have available some tool for virtualization (e.g. VMware Player). To create three virtual PCs with Debian you will need netinstall ISO downloaded from http://www.debian.org/distrib/ website. Installation of Debian ISO as a virtual PC has been throughout described in article ... So let’s assume we have three virtual machines with minimal necessary amount of packages installed on (at least system tools + ssh server to enable us the remote connection). Following guideline mentioned above, single installation of virtual machine will take approximately 10 minutes.
There is set of steps which are necessary to do on each node. At first it is necessary to install Java environment. You need Sun Java SDK. OpenJDK Java available as standard openjdk-6-jdk package is not enough.
At first you need to edit /etc/apt/sources.list
deb http://ftp2.de.debian.org/debian squeeze main non-free
Then update awareness about available packages using
apt-get update
Now check for available Sun Java packages:
apt-cache search sun-java6
Now instal at least these packages:
apt-get install sun-java6-bin sun-java6-javadb sun-java6-jdk sun-java6-plugin
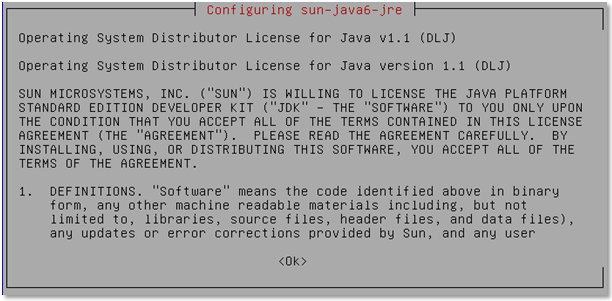
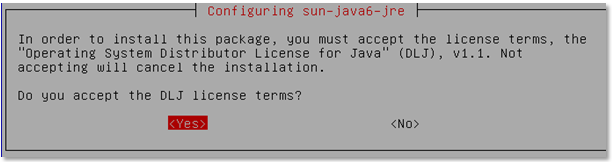
Confirm this dialog window:
update-java-alternatives -s java-6-sun
java -version
java version "1.6.0_22"
Java(TM) SE Runtime Environment (build 1.6.0_22-b04)
Java HotSpot(TM) 64-Bit Server VM (build 17.1-b03, mixed mode)
Now you have to create new group hadoop with user hduser. Use these commands:
addgroup hadoop
adduser --ingroup hadoop hduser
Now you need to create SSH key to enable communication between nodes:
su - hduser
ssh-keygen -t rsa -P ""
cat $HOME/.ssh/id_rsa.pub >> $HOME/.ssh/authorized_keys
Now lets download Hadoop distribution from some of its mirrors:
wget http://mirror.gopotato.co.uk/apache/hadoop/common/stable/hadoop-2.2.0.tar.gz
Decompress tar.gz file using command
tar –zxvf hadoop-2.2.0.tar.gz
and copy to /usr/local folder using
sudo cp –r hadoop-2.2.0/ /usr/local.
Now rename hadoop-2.2.0 directory to hadoop.
chown -R hduser:hadoop /usr/local/hadoop
Now update .bashrc file for hduser and add these rows:
export JAVA_HOME=/usr/lib/jvm/java-6-sun
export HADOOP_INSTALL=/usr/local/hadoop
export PATH=$PATH:$HADOOP_INSTALL/bin
export PATH=$PATH:$HADOOP_INSTALL/sbin
export HADOOP_MAPRED_HOME=$HADOOP_INSTALL
export HADOOP_COMMON_HOME=$HADOOP_INSTALL
export HADOOP_HDFS_HOME=$HADOOP_INSTALL
export YARN_HOME=$HADOOP_INSTALL
Now update /usr/local/hadoop/etc/hadoop/hadoop-env.sh file:
export JAVA_HOME=/usr/lib/jvm/java-6-sun
Update /usr/local/hadoop/etc/hadoop/core-site.xml
<configuration>
<property>
  <name>hadoop.tmp.dir</name>
  <value>/home/hduser/tmp</value>
  <description>Temporary files</description>
</property>
<property>
  <name>fs.default.name</name>
  <value>hdfs://localhost:9000</value>
  <description>Definition of name node</description>
</property>
</configuration>
Update /usr/local/hadoop/etc/hadoop/yarn-site.xml
<configuration>
<property>
   <name>yarn.nodemanager.aux-services</name>
   <value>mapreduce_shuffle</value>
</property>
<property>
   <name>yarn.nodemanager.aux-services.mapreduce.shuffle.class</name>
   <value>org.apache.hadoop.mapred.ShuffleHandler</value>
</property>
</configuration>
mv /usr/local/hadoop/etc/hadoop/mapred-site.xml.template /usr/local/hadoop/etc/hadoop/mapred-site.xml
Update /usr/local/hadoop/etc/hadoop/mapred-site.xml
<configuration>
<property>
   <name>mapreduce.framework.name</name>
   <value>yarn</value>
</property>
</configuration>
Create directory for namenode and datanode:
mkdir -p /home/hduser/mydata/hdfs/namenode
mkdir -p /home/hduser/mydata/hdfs/datanode
chown hduser:hadoop /home/hduser/mydata/hdfs/namenode
chmod 750 /home/hduser/mydata/hdfs/namenode
chown hduser:hadoop /home/hduser/mydata/hdfs/datanode
chmod 750 /home/hduser/mydata/hdfs/datanode
Update /usr/local/hadoop/etc/hadoop/hdfs-site.xml
<configuration>
<property>
   <name>dfs.replication</name>
   <value>1</value>
 </property>
 <property>
   <name>dfs.namenode.name.dir</name>
   <value>file:/home/hduser/mydata/hdfs/namenode</value>
 </property>
 <property>
   <name>dfs.datanode.data.dir</name>
   <value>file:/home/hduser/mydata/hdfs/datanode</value>
 </property>
</configuration>
Format Namenode:
hdfs namenode –format
Check Hadoop version using command hadoop version. You should see something like this:
Hadoop 2.2.0
Subversion https://svn.apache.org/repos/asf/hadoop/common -r 1529768
Compiled by hortonmu on 2013-10-07T06:28Z
Compiled with protoc 2.5.0
From source with checksum 79e53ce7994d1628b240f09af91e1af4
This command was run using /usr/local/hadoop/share/hadoop/common/hadoop-common-2.2.0.jar
Start Hadoop Service
start-dfs.sh
start-yarn.sh
jps
9179 Jps
8607 SecondaryNameNode
8473 DataNode
8391 NameNode
8767 ResourceManager
8851 NodeManager
You can also use Netstat utility to check whether everything is ok:
Active Internet connections (w/o servers)
Proto Recv-Q Send-Q Local Address           Foreign Address         State
tcp        0     52 node1.local:ssh         192.168.57.1:60074      ESTABLISHED
tcp        0      0 localhost:51290         localhost:9000          ESTABLISHED
tcp        0      0 node1.local:ssh         192.168.57.1:57393      ESTABLISHED
tcp        0      0 localhost:51305         localhost:9000          TIME_WAIT
tcp        0      0 localhost:9000          localhost:51290         ESTABLISHED
tcp        0      0 node1.local:ssh         192.168.57.1:57366      ESTABLISHED
tcp6       0      0 node1.localdomain:40395 node1.localdomain:8031  ESTABLISHED
tcp6       0      0 node1.localdomain:8031  node1.localdomain:40395 ESTABLISHED
How to connect to node outside of virtual machine
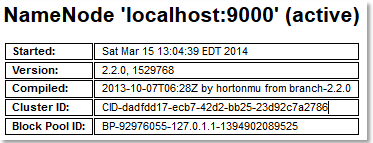
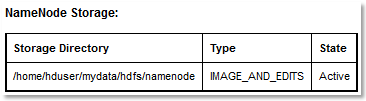
Let’s assume IP of your virtual is 192.168.57.132. You can connect to UI of the Namenode daemon using typing the http://192.168.57.132:50070 to your browser.
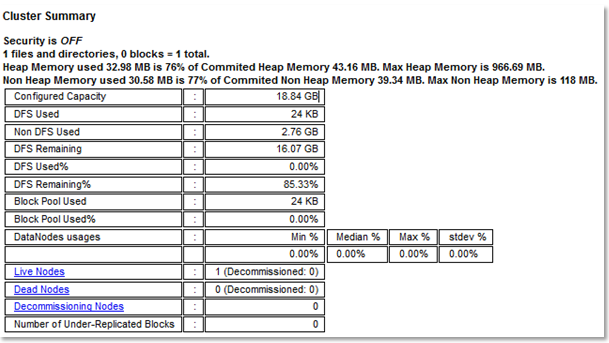
Since now we have only one node in the cluster you will see also this:
- Resource manager: http://192.168.57.132:8088/cluster
- HDFS NameNode web interface: http://192.168.57.132:8042/node
- MapReduce JobHistory Server: http://192.168.57.132: 19888
Stopping Hadoop:
stop-dfs.sh
stop-yarn.sh
Adding nodes’identification to /etc/hosts:
192.168.57.132	node1
192.168.57.133	node2
192.168.57.134	node3
Distribution of keys of nodes
ssh-copy-id -i $HOME/.ssh/id_rsa.pub hduser@node2
ssh-copy-id -i $HOME/.ssh/id_rsa.pub hduser@node3
Test ssh connection from node1 to node2 and node3 using statement ssh hduser@node2 and ssh hduser@node3.
<property>
   <name>dfs.replication</name>
   <value>3</value>
 </property>